


Saturday, 10 March 2012
new-jquery-sliders-for-blogger
New creative jquery sliders for blogs

Are you interested in implementing a content slider in your website? Checkout this list!Here I am going to teach you, how to add a featured content slider to your blogger / blogspot blogs.You're not sure what is it exactly? You`ll see below ;)
Featured Content Slider for Blogger Using jQuery

Instructions To Follow:
STEP #1
Log in to Blogger , go to Design -> Edit HTML and mark the tick box "Expand Widget Templates"
STEP #2
find (CTRL+F) this code in the template:
]]></b:skin>
And immediately before it, paste this code:
#featured{
width:400px;
padding-right:250px;
position:relative;
height:250px;
background:#fff;
border:5px solid #ccc;
}
#featured ul.ui-tabs-nav{
position:absolute;
top:0; left:400px;
list-style:none;
padding:0; margin:0;
width:250px;
}
#featured ul.ui-tabs-nav li{
padding:1px 0; padding-left:13px;
font-size:12px;
color:#666;
}
#featured ul.ui-tabs-nav li span{
font-size:11px; font-family:Verdana;
line-height:18px;
}
#featured .ui-tabs-panel{
width:400px; height:250px;
background:#999; position:relative;
overflow:hidden;
}
#featured .ui-tabs-hide{
display:none;
}
#featured li.ui-tabs-nav-item a{/*On Hover Style*/
display:block;
height:60px;
color:#333; background:#fff;
line-height:20px;
outline:none;
}
#featured li.ui-tabs-nav-item a:hover{
background:#f2f2f2;
}
#featured li.ui-tabs-selected{ /*Selected tab style*/
background:url('selected-item.gif') top left no-repeat;
}
#featured ul.ui-tabs-nav li.ui-tabs-selected a{
background:#ccc;
}
#featured ul.ui-tabs-nav li img{
float:left; margin:2px 5px;
background:#fff;
padding:2px;
border:1px solid #eee;
}
#featured .ui-tabs-panel .info{
position:absolute;
top:180px; left:0;
height:70px; width: 400px;
background: url('transparent-bg.png');
}
#featured .info h2{
font-size:18px; font-family:Georgia, serif;
color:#fff; padding:5px; margin:0;
overflow:hidden;
}
#featured .info p{
margin:0 5px;
font-family:Verdana; font-size:11px;
line-height:15px; color:#f0f0f0;
}
#featured .info a{
text-decoration:none;
color:#fff;
}
#featured .info a:hover{
text-decoration:underline;
}
STEP #2
Now find (CTRL+F) this code in the template:
]]></b:skin>
And immediately after it, paste this code:
<script src='http://ajax.googleapis.com/ajax/libs/jquery/1.3.2/jquery.min.js' type='text/javascript'/>
<script src='http://ajax.googleapis.com/ajax/libs/jqueryui/1.5.3/jquery-ui.min.js' type='text/javascript'/>
<script type='text/javascript'>
$(document).ready(function(){
$("#featured > ul").tabs({fx:{opacity: "toggle"}}).tabs("rotate", 5000, true);
});
</script>
<script src='http://ajax.googleapis.com/ajax/libs/jqueryui/1.5.3/jquery-ui.min.js' type='text/javascript'/>
<script type='text/javascript'>
$(document).ready(function(){
$("#featured > ul").tabs({fx:{opacity: "toggle"}}).tabs("rotate", 5000, true);
});
</script>
Now Click Save Template
STEP #3
Go to Design -> Click on "Add a Gadget" -> HTML/JavaScript type.
And copy paste this code in to it:
<div id='featured'>
<ul class='ui-tabs-nav'>
<li class='ui-tabs-nav-item ui-tabs-selected' id='nav-fragment-1'><a href='#fragment-1'><img alt='pic1' src='http://i49.tinypic.com/e1aohv.jpg'/><span>Install Mac OS X on Intel/AMD PC using iATKOS v7</span></a></li>
<li class='ui-tabs-nav-item' id='nav-fragment-2'><a href='#fragment-2'><img alt='blogger' src='http://i438.photobucket.com/albums/qq108/fooble11/image2-small.jpg'/><span>How to remove "showing post with label" in Blogger</span></a></li>
<li class='ui-tabs-nav-item' id='nav-fragment-3'><a href='#fragment-3'><img alt='buzz' src='http://i438.photobucket.com/albums/qq108/fooble11/new1.jpg'/><span>How to add Google Buzz to Blogspot blog</span></a></li>
<li class='ui-tabs-nav-item' id='nav-fragment-4'><a href='#fragment-4'><img alt='chat' src='http://i50.tinypic.com/34xfg4m.jpg'/><span>Chat live with your blog visitors using Yahoo Pingbox</span></a></li>
</ul>
<!-- First Content -->
<div class='ui-tabs-panel' id='fragment-1' style=''>
<img alt='mac' src='http://i47.tinypic.com/rsbi80.jpg'/>
<div class='info'>
<h3><a href='#'>Install Mac OS X on Intel/AMD PC using iATKOS v7</a></h3>
<p>Description goes here, this is just a test description....<a href='http://www.bloggermint.com/2010/02/install-mac-os-x-on-intelamd-pc-using.html'>read more</a></p>
</div>
</div>
<!-- Second Content -->
<div class='ui-tabs-panel ui-tabs-hide' id='fragment-2' style=''>
<img alt='' src='http://i50.tinypic.com/33kprh5.jpg'/>
<div class='info'>
<h3><a href='#'>How to remove "showing post with label" in Blogger</a></h3>
<p>Description goes here, this is just a test description....<a href='#'>read more</a></p>
</div>
</div>
<!-- Third Content -->
<div class='ui-tabs-panel ui-tabs-hide' id='fragment-3' style=''>
<img alt='' src='http://i47.tinypic.com/2191lqt.jpg'/>
<div class='info'>
<h3><a href='#'>How to add Google Buzz to Blogspot blog</a></h3>
<p>Description goes here, this is just a test description....<a href='#'>read more</a></p>
</div>
</div>
<!-- Fourth Content -->
<div class='ui-tabs-panel ui-tabs-hide' id='fragment-4' style=''>
<img alt='' src='http://i48.tinypic.com/10pwp3o.jpg'/>
<div class='info'>
<h3><a href='#'>Chat live with your blog visitors using yahoo</a></h3>
<p>Description goes here, this is just a test description....<a href='#'>read more</a></p>
</div>
</div> </div>
Now Click Save
................................................................................................
................................................................................................
................................................................................................
Simple jQuery Featured Content Slider for Blogger Blog

Instructions To Follow:
STEP #1
Log in to Blogger, go to Design -> Edit HTML and mark the tick box "Expand Widget Templates"
STEP #2
Now find (CTRL+F) this code in the template:
STEP #1
Log in to Blogger, go to Design -> Edit HTML and mark the tick box "Expand Widget Templates"
STEP #2
Now find (CTRL+F) this code in the template:
]]></b:skin>
And immediately before it, paste this code:
#jFlowSlide{ background:#f8f8f8; font-family: Georgia; }
#myController { font-family: Georgia; padding:2px 0; width:610px; background:#000000; }
#myController span.jFlowSelected { background:#43A0D5;margin-right:0px; }
.slide-wrapper { padding: 5px; }
.slide-thumbnail { width:300px; float:left; }
.slide-thumbnail img {max-width:300px; }
.slide-details { width:290px; float:right; margin-left:10px;}
.slide-details h2 { font-size:1.5em; font-style: italic; font-weight:normal; line-height: 1; margin:0; }
.slide-details .description { margin-top:10px; }
.jFlowControl, .jFlowPrev, .jFlowNext { color:#FFF; cursor:pointer; padding-left:5px; padding-right:5px; padding-top:2px; padding-bottom:2px; }
.jFlowControl:hover, .jFlowPrev:hover, .jFlowNext:hover { background: #43A0D5; }
STEP #3
Now find (CTRL+F) this code in the template:
</head>
And immediately before it, paste this code:
<script language='javascript' src='http://ajax.googleapis.com/ajax/libs/jquery/1/jquery.min.js' type='text/javascript'/>
<script language='javascript' src='http://sites.google.com/site/freebloggerhelpbiz/freebloggerhelp/jquery.flow.1.2.auto.js' type='text/javascript'/>
<script type='text/javascript'>
$(document).ready(function(){
$("#myController").jFlow({
slides: "#slides",
controller: ".jFlowControl", // must be class, use . sign
slideWrapper : "#jFlowSlide", // must be id, use # sign
selectedWrapper: "jFlowSelected", // just pure text, no sign
auto: true, //auto change slide, default true
width: "610px",
height: "235px",
duration: 100,
prev: ".jFlowPrev", // must be class, use . sign
next: ".jFlowNext" // must be class, use . sign
});
});
</script>
Now Click Save Template
Finally go to Page Elements --> Add a Gadget --> HTML/JAVA Script. And add following code to it.
<div class="jflow-content-slider">
<div id="slides">
<-! Slide #1 Starts-->
<div class="slide-wrapper">
<div class="slide-thumbnail">
<img alt="" src="IMAGE-LINK"/>
</div>
<div class="slide-details">
<span style="font-size: large;"><b> TITLE-OF-THE-SLIDE</b></span>
<div class="description">
TEXT-OF-THE-SLIDE
</div>
</div>
<div class="clear"></div>
</div>
<!-- Slide # 1 Ends -->
<-! Slide #2 Starts-->
<div class="slide-wrapper">
<div class="slide-thumbnail">
<img alt="" src="IMAGE-LINK"/>
</div>
<div class="slide-details">
<span style="font-size: large;"><b> TITLE-OF-THE-SLIDE</b></span>
<div class="description">
TEXT-OF-THE-SLIDE
</div>
</div>
<div class="clear"></div>
</div>
<!-- Slide # 2 Ends -->
<-! Slide #3 Starts-->
<div class="slide-wrapper">
<div class="slide-thumbnail">
<img alt="" src="IMAGE-LINK"/>
</div>
<div class="slide-details">
<span style="font-size: large;"><b> TITLE-OF-THE-SLIDE</b></span>
<div class="description">
TEXT-OF-THE-SLIDE
</div>
</div>
<div class="clear"></div>
</div>
<!-- Slide # 3 Ends -->
.
.
.
.
<!-- You can add as many slides as you want above this line -->
</div>
<div id="myController">
<span class="jFlowPrev">Prev</span>
<span class="jFlowControl">1</span>
<span class="jFlowControl">2</span>
<span class="jFlowControl">3</span>
<!-- Increase these numbers as with the increase in your number of slides above -->
<span class="jFlowNext">Next</span>
</div>
<div class="clear"></div>
</div>
t's Done.
Customization
Code 1. You can change the background colors in code 1 to suit your blog.
Code 2. First of all downloadhttp://sites.google.com/site/freeblo...ow.1.2.auto.js and upload it to google sites .
You can change width, height and duration speed.
Code 3. As you look on code 3 there are 3 slide codes. First give the image link, add title and finally add description. Do same with all three codes. You can add more slide by adding the code:
<div class="slide-wrapper">
<div class="slide-thumbnail">
<img alt="" src="IMAGE-LINK"/>
</div>
<div class="slide-details">
<span style="font-size: large;"><b> TITLE-OF-THE-SLIDE</b></span>
<div class="description">
TEXT-OF-THE-SLIDE
</div>
</div>
<div class="clear"></div>
</div>
<div class="slide-thumbnail">
<img alt="" src="IMAGE-LINK"/>
</div>
<div class="slide-details">
<span style="font-size: large;"><b> TITLE-OF-THE-SLIDE</b></span>
<div class="description">
TEXT-OF-THE-SLIDE
</div>
</div>
<div class="clear"></div>
</div>
Also you have to add
4
after
3
and so on for next slides.
................................................................................................
................................................................................................
................................................................................................
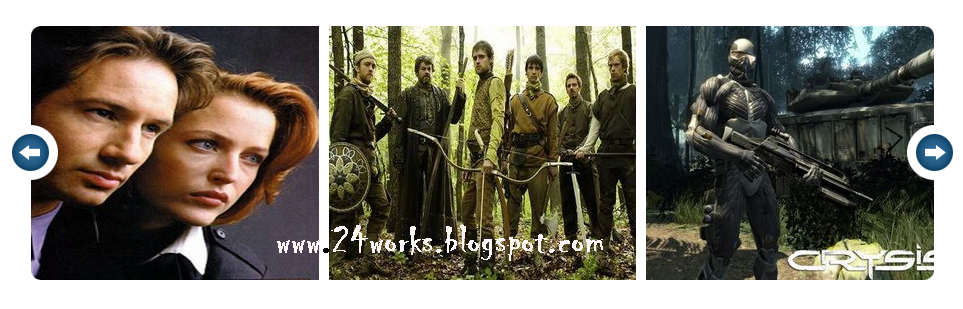
How To Add Smart Jquery Featured Slider to Blogger/Websites
Instructions To Follow:
STEP #1
Log in to Blogger, go to Design -> Edit HTML and mark the tick box "Expand Widget Templates"
STEP #2
Now find (CTRL+F) this code in the template:
</head>
And immediately before it, paste this code:
<script src='http://bnote.googlecode.com/files/jquery-1.2.6.min.js' type='text/javascript'></script>
<script src='http://bnote.googlecode.com/files/jquery.jcarousel.pack.js' type='text/javascript'></script>
<script src='http://bnote.googlecode.com/files/jquery-ui-personalized-1.5.2.packed.js' type='text/javascript'></script>
<script type="text/javascript">
jQuery(document).ready(function() {
jQuery('#mycarousel').jcarousel({
wrap:"both",
scroll:2,
animation:"slow"
});
function mycarousel_initCallback(carousel) {
jQuery('#featured-next-button').bind('click', function() {
carousel.next();
return false;
});
jQuery('#featured-prev-button').bind('click', function() {
carousel.prev();
return false;
});
jQuery('.button-nav span').bind('click', function() {
carousel.scroll(jQuery.jcarousel.intval(jQuery(this).text()));
return false;
});
};
jQuery('#feature-carousel').jcarousel({
wrap:"both",
scroll:1,
auto:10,
initCallback: mycarousel_initCallback,
buttonNextHTML: null,
buttonPrevHTML: null
});
});
</script>
<style type="text/css">
.jcarousel-skin-tango .jcarousel-container {-moz-border-radius: 10px;}
.jcarousel-skin-tango .jcarousel-container-horizontal {width: 941px;margin: 0 auto;padding:0 20px;}
.jcarousel-skin-tango .jcarousel-clip-horizontal {width: 941px;height: 254px;}
.jcarousel-skin-tango .jcarousel-item {width: 307px;height: 254px;}
.jcarousel-skin-tango .jcarousel-item-horizontal {margin-right: 10px;}
.jcarousel-skin-tango .jcarousel-item-placeholder {background: #fff;color: #000;}
.jcarousel-skin-tango .jcarousel-next-horizontal {
background:transparent url(https://blogger.googleusercontent.com/img/b/R29vZ2xl/AVvXsEifSj5AeNapVvJF9DvsoTwjuMw_8OqOJ0UpmjnapQW3KEziPf8czj-9s64SsHsgcoyD1MzYmQPpURMh2gzj1rJINuzLa7R-cgd0nPAKezOZ0YRnDX4mdhQAShvg7iJPv_LZAJTevTIIcylN/s1600/image-slider-button.png) no-repeat scroll -46px 0;
cursor:pointer;
height:254px;
right:20px;
position:absolute;
top:0;
width:46px;
}
.jcarousel-skin-tango .jcarousel-prev-horizontal {
background:transparent url(https://blogger.googleusercontent.com/img/b/R29vZ2xl/AVvXsEifSj5AeNapVvJF9DvsoTwjuMw_8OqOJ0UpmjnapQW3KEziPf8czj-9s64SsHsgcoyD1MzYmQPpURMh2gzj1rJINuzLa7R-cgd0nPAKezOZ0YRnDX4mdhQAShvg7iJPv_LZAJTevTIIcylN/s1600/image-slider-button.png) no-repeat scroll 0 0;
cursor:pointer;
height:254px;
left:20px;
position:absolute;
top:0;
width:46px;
}
.jcarousel-container {position: relative;}
.jcarousel-clip {z-index: 2;padding: 0;margin: 0;overflow: hidden;position: relative;}
.jcarousel-list {z-index: 1;overflow: hidden;position: relative;top: 0;left: 0;margin: 0;padding: 0;}
.jcarousel-list li,.jcarousel-item {float: left;list-style: none;width: 75px;height: 75px;}
.jcarousel-next {z-index: 3;display: none;}
.jcarousel-prev {z-index: 3;display: none;}
#news-slider{background-color:#FFFFFF;padding:20px 0;}
#news-slider img{border:none;height:254px;width:307px;}
</style>
Now click Save Template
STEP #3
Go to Design -> Click on "Add a Gadget" -> HTML/JavaScript type.
And copy paste this code in to it:
<div id='news-slider'>
<ul class='jcarousel-skin-tango' id='mycarousel'>
<li><a href='SLIDE-1-LINK-HERE'><img src='SLIDE-1-IMAGE-ADDRESS-HERE'/></a></li>
<li><a href='SLIDE-2-LINK-HERE'><img src='SLIDE-2-IMAGE-ADDRESS-HERE'/></a></li>
<li><a href='SLIDE-3-LINK-HERE'><img src='SLIDE-3-IMAGE-ADDRESS-HERE'/></a></li>
<li><a href='SLIDE-4-LINK-HERE'><img src='SLIDE-4-IMAGE-ADDRESS-HERE'/></a></li>
<li><a href='SLIDE-5-LINK-HERE'><img src='SLIDE-5-IMAGE-ADDRESS-HERE'/></a></li>
</ul>
</div>
NOTE : Replace,
SLIDE-X-LINK-HERE with your real featured posts links.
SLIDE-X-IMAGE-ADDRESS-HERE with your real slide images addresses.
Look at the example below:
<div id='news-slider'>
<ul class='jcarousel-skin-tango' id='mycarousel'>
<li><a href='#'><img src='https://blogger.googleusercontent.com/img/b/R29vZ2xl/AVvXsEg2qhHhwxkrjs26GtnaIDOyRJlohLOlutVHt8Ip3RV1CcMsxBjDn34qpoKhFWacvD0n4Ue46ZnhLvYsa-tAlFdlQcGgqAFCPxrKVpasMGae5PdRAeHYt4TZr862Ra5K6nRgQoQKoWda8Oeq/s1600/slide1.jpg'/></a></li>
<li><a href='#'><img src='https://blogger.googleusercontent.com/img/b/R29vZ2xl/AVvXsEgYib5VjzcLR3vpM2SFhC2cmmJjNx9QlToMN1OwLPk9qxwFgZyoDhxzb2ezwsSG1NTeOt0Mms0lNUtwrOC_rwl0iB9vI74hoF4Q4lXnYJNFy1H2XN_c-biOkEX0zq1aXffcT_hxQhp3dMx6/s1600/slide2.jpg'/></a></li>
<li><a href='#'><img src='https://blogger.googleusercontent.com/img/b/R29vZ2xl/AVvXsEgwd7T-1JfGMrJUuShVI-FISjZfbw1g8zeIdM1Z2yeSM7ipkhEWmQ2N8UhYTZ1iDfucYAljbRdKv2gY4l9M-EDXpGfkM15H2id35i3qT3MT0w9ponib7FyTmUA4oNjwvW4964CTCp1JUgF1/s1600/slide3.jpg'/></a></li>
<li><a href='#'><img src='https://blogger.googleusercontent.com/img/b/R29vZ2xl/AVvXsEgIYklFuBIBV1q3ZsrUcMVWtFZaWmP4EkyzSPZxFhYEKF4YnpnVFLeyOe2gdW24doZRiPHSaCKmNdkTnb_OTk8khHKWRQCqmZcuCqUxZtzx2Cwo4_AHfbidyePP8Ga_Y1vOK4FV0Wl2WXDo/s1600/slide4.jpg'/></a></li>
<li><a href='#'><img src='https://blogger.googleusercontent.com/img/b/R29vZ2xl/AVvXsEhJ9HcDpNTzWJfmx-EV_4axN57xKeorjlZdNRXRIc6Ey46Mi_CBlzlWuiJx7fvqxRD0-X4DPf6vo35HXWnERRmqHYAy5ZTzmWpJ3iPEn2agv3Omb38bJR9CnotFSD_HbACn2nr4RtIdCU8G/s1600/slide5.jpg'/></a></li>
</ul>
</div>
You are done.


0 comments:
Post a Comment